Vintage Sewing Machines Month 1 February Mueller 15
Feb-2012
Hi Everyone, so this is such a pretty little project, I’ve changed the sashing slightly to make it a little harder then the pattern AND I’ve changed the order of the blocks so it will be a bit of a mystery 😉
Here’s a video I did for Journey of a Quilter but it still applies today – it will show you the backstitch, french knot and a quilters knot. Plus it will show you how to organize your flosses!
Here’s month 1 Mueller 15
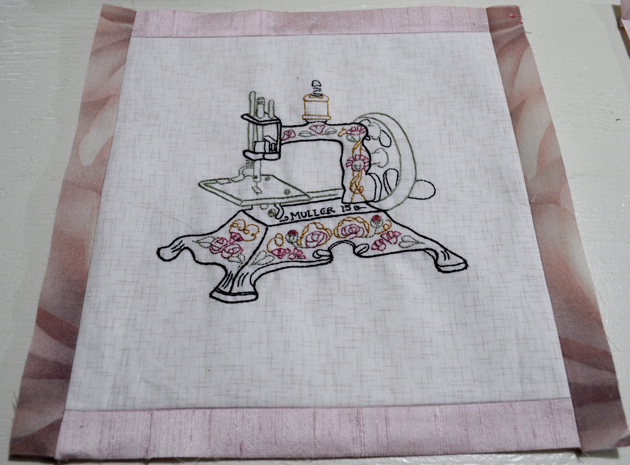
It’s important how you do your sashing so it is a proper order or the flow just won’t be there…I’ve also changed the background fabric for the stitchery I used the backside, yep the wrong side of the fabric so the pattern was a less vibrant. Some of you have pinks and browns and some have toupes and greys…
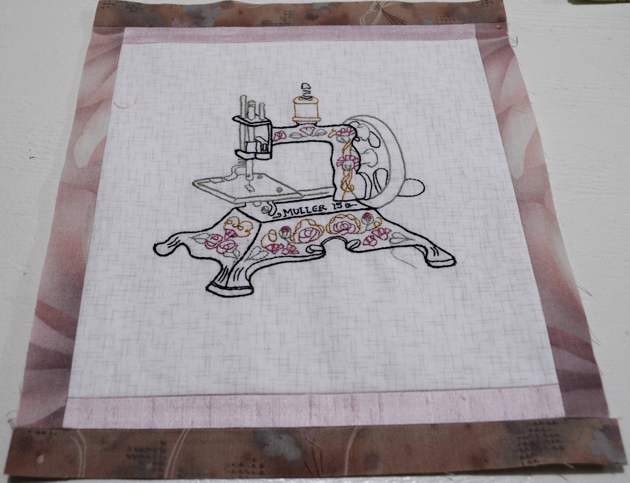
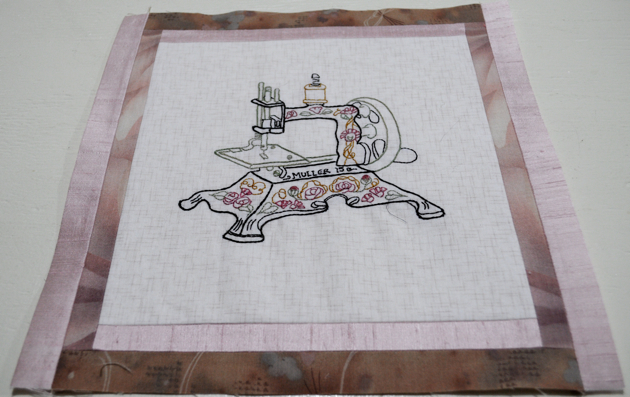
You will receive more border fabrics in your next months kit, I didn’t include everything as the post bill would have been over budget 🙂 but more will be coming!! You will have enough fabrics in your kits for the entire FRONT 🙂
March 9 2012 Updated!!
Michelle, contacted and asked what size are we cutting the border fabrics, I thought I had put it in here but I missed that. Sorry ladies, the border fabrics will be cut 1″ width segments so when they are finished they will be .5″ wide. Take your time cutting and pressing these.
When cutting the Silk, apply the fuse to the back of the silk (remember both sides of the silk can be the right side) and then square up your edge, cut your sections on the croswise grain side. So you will be cutting 1″ x 19.5″ lengths. Any questions let me know!
Before your add your borders, you’ll need to square up your blocks to 9.5″ square so they will finish 9″ square.
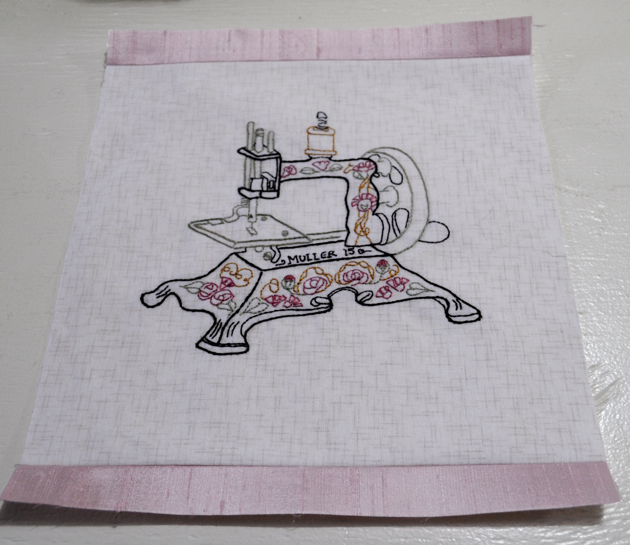
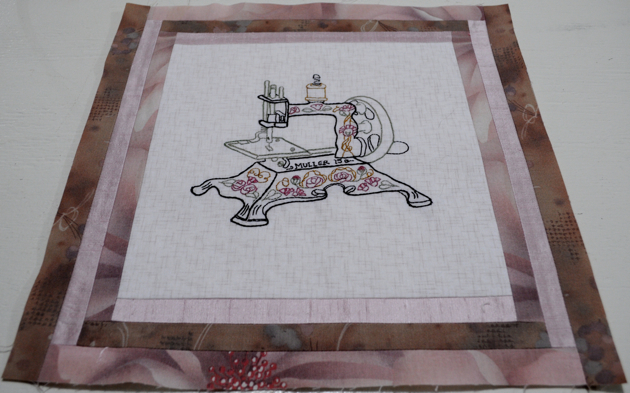
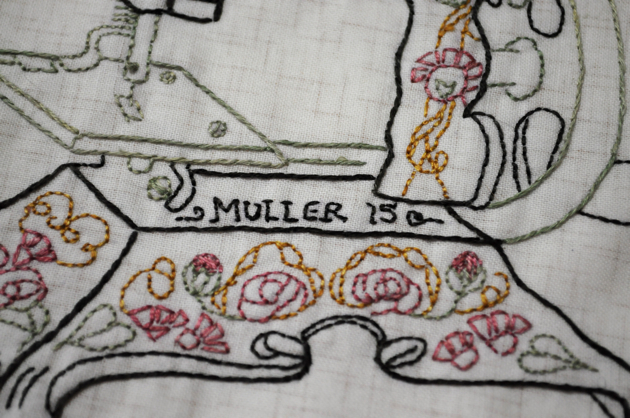
and a close up of the stitchery 🙂 I have used a combination of the stem stitch and the backstitch with two strands of the floss.
The pattern is a bit confusing when it comes to the floss colours that are used. If you go back the folder cover there seems to be more soft blue used then soft green, but if you look at the monthly pattern cover it seems that their is more soft green used then soft blue. I’m way ahead on my months and as you’ll be able to see I’ve used soft greens instead of soft blues but as I said in the email, soft blues are on their way. Please make it your own using the colours where you would love to see them.
You have two pieces of interfacing in your kits. One is for the 10xWOF stitchery background fabric and one is for the silk. When you fuse it to the silk, use a hot dry iron as well as when you fuse it to the cotton. There is no need for steam.
You will receive the rest of your border fabric in your next month kit. It was just too thick to ship in this first batch. As well as the soft blue floss.
For the iron on transfers, you use a hot dry iron. The drawing is already reversed. You need to determine which side of the cotton you want to you for your front for the stitchery. Place the iron on transfer in the middle of your 10×10 square. Place iron on face down centered. Hold in place, PRESS with your iron hit and dry, holding for several seconds in each place until the whole picture is transferred. While still in place life each corner being careful not to shift the drawing to make sure it’stransferred. You might need to touch up some areas with your pig a pen if it didn’t transfer all the way.